Beware these 5 common instrument use, inspection and testing myths

Misinformation about surgical instruments and instrument processing is widespread across the healthcare industry. Many educators have not updated their knowledge and teaching techniques to stay current with the instrument manufacturer’s knowledge and testing methods. As a result, outdated processing knowledge and inaccurate education may result in patient safety issues. Knowing the facts is essential.
What follows are some common myths that must be addressed:
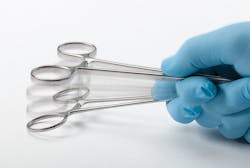
Myth #1: It is safe and acceptable to use hemostats as tube clamps for intravenous tubing.
Fact: No. Using a hemostat to clamp the tube is not safe for the patient. Hemostats typically have finer jaws than a tube clamp, and the box lock of hemostats are not as strong. Because of this, hemostats are highly prone to cracking and, even worse, releasing/popping off the tube. Hemostats are designed to clamp vessels to control blood flow, which is achieved by both jaws closing fully. Furthermore, the serrations on a hemostat may damage the actual tubing. Common tube clamps, such as Presbyterian, come with smooth or serrated jaws to secure tubing. The other most popular tube clamp is the Vorse, which has a “guard” to support the jaws and box lock when clamping the tube. This pattern is called a Vorse with guard or Vorse Guardian.
Myth #2: To inspect a needle holder, it is necessary to click it on the first ratchet and hold it up to the light to visualize the center of the jaws.
Fact: This technique is outdated, slow and reduces efficiency when inspecting surgical instruments. Because there are different teeth per square inch, depending on the pattern, the needle holder may be worn, even though light does not show through; however, this technique is effective for needle holders with smooth jaws, such as Webster, Halsey and Castroviejo, which have no tread in the jaws. The most recognized and efficient technique for inspecting needle holder jaws is to separate the rings and visually inspect the hinge area and the jaws for treadwear and bioburden.
Myth #3: Clamping aluminum foil is the preferred way to test needle holders for jaw wear.
Fact: Using aluminum foil to test tread wear is a slow, outdated technique. The most effective method is to separate the rings and inspect the jaws for treadwear and bioburden.
Myth #4: Ratchet testing is performed by tapping the instrument in the palm of the hand.
Fact: Tapping the instrument in the palm of the hand is not an accurate method to ensure the ratchets are properly aligned. The hand has a soft surface and is not completely flat. A completely flat surface must be used, such as tapping on a table/work surface. The purpose of tapping the instrument on a hard work surface is to simulate the instrument hitting another instrument, causing it to pop open. When performing this test, click the ratchet only once so it is in the first position. If the ratchet pops open, that indicates the ratchets need to be realigned, and the instrument should be removed from service and sent out for repair. This is a common and inexpensive repair. This technique should be used on all hemostats, needle holders and any other ratcheted instrument.
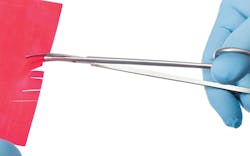
Myth #5: When testing rongeurs and scissors for sharpness, the entire jaw or front half of the jaw or blade should be tested.
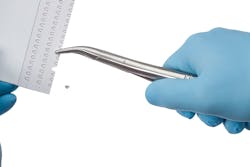
Fact: Rongeurs should cut cleanly through one thickness of an index card or card stock. To perform this test, use only the top 1/3 of the jaw. The instrument should not tear or snag the testing card. The middle and back of the cup jaw are not used during the surgical procedure. When testing the sharpness of a scissor, either red or yellow scissor test material should be used. Scissors with an overall length longer than 4 ½” should cut cleanly through red scissor test material. Scissors with an overall length of 4 ½” and shorter should cut cleanly through yellow scissor test material. When testing the sharpness of a scissor, use only the distal 1/3 of the blade (it is incorrect to test the middle or back of the blade). If the testing material snags or is not cut cleanly, the scissors should be tagged and sent out for sharpening.
Conclusion
Although many of these myths, initially, may seem small and insignificant, they can have a major impact on the performance of the instrument and, more importantly, on the patient. Knowing the facts will improve patient safety.
An extended version of this article was published in the Jan/Feb 2019 issue of PROCESS, IAHCSMM’s bi-monthly magazine.